
Post by pezerologo on May 2, 2015 21:55:43 GMT
Hi everyone !!
I have prepared a small Tutorial Photoshop for handling fish in photographs.
This program is a valuable professional tool and use 100% of its resources is something which at the moment is out of my reach.
It is important to know the limitations of each in the learning process and exploit the utilities know.
With a program like this the possibilities are virtually limitless so to begin with, it is a good choice to focus on a few minor adjustments and know them well.
In this case we will learn a few basic settings that will make our photos look much better.
These tools are:
-Cut
-Contrast
-Tone
-color
-Choose With magnetic loop
-Filter Focus
-Blur filter
This will be the theoretical part where I explain step by step how to get a photo with a much better look.
In the second part we will do photos in a way more graphic.
I tell you that I am currently using Photoshop CS4, now that they are not already, but you could "buy" any of the following: CS3 - CS4 - CS5 or later.
Once installed tengais what we only need to select the photo you go to start.
The steps that we use on this occasion are focused to get good pictures of our fish.
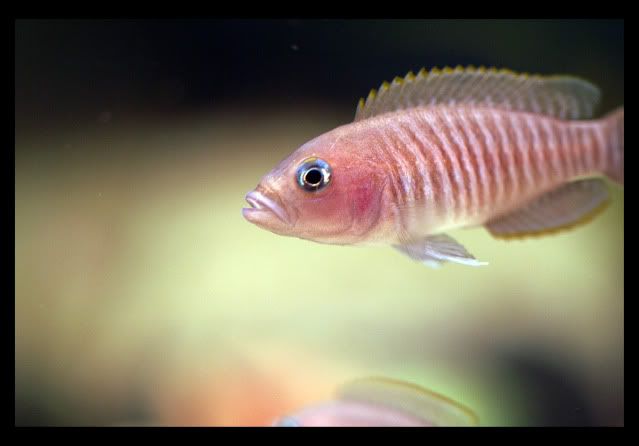
We must try to choose one that is as focused as possible, remembering the rule that a focused eye is more important than a well-focused body or fins.
When we see pictures of animals or people, our view is going inevitably to the eyes and face, so it's important that I look good crisp.
We have selected the picture, now we will start working with it.
We click on File -> Open ----> We look for the file and load it.
Once we have the photo loaded first thing we do we are duplicate the layer, so work on a second layer and in the case of mistake will not affect the original file.
This is done so, Layers -> Duplicate Layer ----> We accept in the window that will open and it's ready.
The following would fit the picture on the screen for a better view and work with more references.
Open View -> Fit on Screen
The first adjustment that we will give the picture the frame you want, usually with a little closer to the fish already won much the picture, there are several rules to help us with the composition such as three-quarters or even the divine proportion or number phi.
But not to complicate a lot, I do it as best you look, I trust your judgment.
We'll talk about these rules in another article.
To make the cut, we can use the Zoom tool to zoom and approach the desired trimming.
Using the Rectangular frame tool bar that is on the left, the first,
select the area to trim.
Once we have punctured Image -> Crop and there we have our new frame.
Return to open View -> Fit on Screen
Now let's contrast a little and you will go here and watching how the image is substantially improved, it's an automatic setting where we have to change any security.
Open Image -> Auto Contrast Tachaaaaan !!!! A somewhat improved picture? I guess if and only with this setting, and often much more to come as our eyes.
These automatic settings are not always right and on occasion distort the original colors, but at other times, make a subtle change that adds more realism to the picture.
And I say, I usually do not always make these adjustments and I try to see the effect your eye here will be the best to decide in each case.
If we are going to use it is as simple as the previous image -> Automatic Tone or Color Image -> Automatic Color
In case we do not like the result, it is easy to return to the previous state, open Edit -> Undo or also step back.
If you have followed the steps well and have chosen or discarded the last adjustment, the picture has already look different.
Now we will know a tool that is very useful to select specific areas of work within a photo.
For that we will use, for example serious to select the outline of a fish or her face, eyes, etc.
The most common tool is to select click with the left mouse button and dragging do a square, rectangle, etc.
This is good for certain situations, but what we need we, the Magnetic Lasso tool has almost magical properties.
On the left side select Magnetic Lasso
It is a very easy tool to use, select the area we want to go around, for example the body of a fish.
We began the first point on the head and we are passing and putting all your profile points.
You will see how it lives up to its name as the only magnetic usually recognize the contours and adapt.
When we're almost finished the outline, clik twice and the selection is closed.
We already have a selected area where working with the approach.
This is one of the most grateful of the process and also important parts because if we had to approach the result can be a bit "weird"
Open Filter -> Focus -> Sharpen
We have to open a window in which to work with different values, where also a small screen preview the changes we perform appears.
I recommend this little screen preview normally comes with the zoom to 100% bajéis something to have a more complete view of change.
We will take the stick of pixels and we go up in value, with June 1, it may be enough ... or too much.
Do tests to see results and keep in mind that to see the changes in real time, you have to click on the image on the small screen preview window. There you will see how something changes the thing.
We can also change another option that is ratio, only a little change and look to see what we think.
Here our photo must already have a much more attractive appearance.
The next step may not be necessary but it is also interesting. If buscabamos focus before, now we want to blur.
Blur will be useful in some pictures where you look too deep, a piece of another fish or filter, we do not want to call attention or similar situations appear.
This would be similar case, select the area you want to blur the already known tool Magnetic Lasso
Again we will go step by step putting points with the left mouse button and anger following line those points.
When we opened the selected area Filter -> Blur -> Smart Blur
This is a similar tool in their use to the approach we have just met. In this case it is worth remembering that it is always better subtle drastic change you can give us an unrealistic blur.
Again we have to test and try to get a realistic result and not very exaggerated.
And with that ending and we would go our photos and will look better.
If you like to add frame it is also very simple and with many possibilities.
We will open again Image -> Canvas Size
You will see a window where you can change the policy, activate the Relative ground and put Cm.
It is try depending on the size of your photos. In the window you will see that you can change some numeric values, you go trying different measures as 2-3-4-5-6-7-8 cm until you find the extent that fits the size of your image.
The photos of my camera are quite large as 120 cm by 50 cm and stuff, usually I put 8 cm frame.
Keep trying and you will find the ideal measure.
In the same window below you can put the color you want in the frame; White, Black, Blue, Yellow or even several colors to your liking.
And for the most important end as storage.
Open File -> Save As and put where best you look or where usually put your photos.
Remember the rename to not replace the original picture and not miss any.
You have to see when stored in that format is doing, usually will do it in .psd format is Photoshop, which allows you to continue to edit the photo later.
But what we want is to keep the final copy, which we will change the .psd to .jpeg, a format we all know, both we and our computers, displays, the photobucket, etc.
After saving the photo, telling close the photo do not want to save in the window that will come out and we can start with the following.
I hope you find it useful and not much mess, if you follow these steps give surprising results.
Any question or questions you have to ask and look for solutions.
For the second part you will be seeing more graphic settings every step I appreciate that I mandarais a photo with which to work, so you will see how these simple steps they can manage many photographs.
If possible as I said above that as the fish see relatively close and focused.
As you could see we have only used a few tools of the hundreds or thousands who have Photoshop in any version.
I started relatively recently with this program and am slowly discovering interesting tools and treatments.
According desenvolviendome go best with it, I'll put new tutorials for you can also move forward and achieve results with spectacular photos.
Gr3tings !!!
I have prepared a small Tutorial Photoshop for handling fish in photographs.
This program is a valuable professional tool and use 100% of its resources is something which at the moment is out of my reach.
It is important to know the limitations of each in the learning process and exploit the utilities know.
With a program like this the possibilities are virtually limitless so to begin with, it is a good choice to focus on a few minor adjustments and know them well.
In this case we will learn a few basic settings that will make our photos look much better.
These tools are:
-Cut
-Contrast
-Tone
-color
-Choose With magnetic loop
-Filter Focus
-Blur filter
This will be the theoretical part where I explain step by step how to get a photo with a much better look.
In the second part we will do photos in a way more graphic.
I tell you that I am currently using Photoshop CS4, now that they are not already, but you could "buy" any of the following: CS3 - CS4 - CS5 or later.
Once installed tengais what we only need to select the photo you go to start.
The steps that we use on this occasion are focused to get good pictures of our fish.
We must try to choose one that is as focused as possible, remembering the rule that a focused eye is more important than a well-focused body or fins.
When we see pictures of animals or people, our view is going inevitably to the eyes and face, so it's important that I look good crisp.
We have selected the picture, now we will start working with it.
We click on File -> Open ----> We look for the file and load it.
Once we have the photo loaded first thing we do we are duplicate the layer, so work on a second layer and in the case of mistake will not affect the original file.
This is done so, Layers -> Duplicate Layer ----> We accept in the window that will open and it's ready.
The following would fit the picture on the screen for a better view and work with more references.
Open View -> Fit on Screen
The first adjustment that we will give the picture the frame you want, usually with a little closer to the fish already won much the picture, there are several rules to help us with the composition such as three-quarters or even the divine proportion or number phi.
But not to complicate a lot, I do it as best you look, I trust your judgment.
We'll talk about these rules in another article.
To make the cut, we can use the Zoom tool to zoom and approach the desired trimming.
Using the Rectangular frame tool bar that is on the left, the first,
select the area to trim.
Once we have punctured Image -> Crop and there we have our new frame.
Return to open View -> Fit on Screen
Now let's contrast a little and you will go here and watching how the image is substantially improved, it's an automatic setting where we have to change any security.
Open Image -> Auto Contrast Tachaaaaan !!!! A somewhat improved picture? I guess if and only with this setting, and often much more to come as our eyes.
These automatic settings are not always right and on occasion distort the original colors, but at other times, make a subtle change that adds more realism to the picture.
And I say, I usually do not always make these adjustments and I try to see the effect your eye here will be the best to decide in each case.
If we are going to use it is as simple as the previous image -> Automatic Tone or Color Image -> Automatic Color
In case we do not like the result, it is easy to return to the previous state, open Edit -> Undo or also step back.
If you have followed the steps well and have chosen or discarded the last adjustment, the picture has already look different.
Now we will know a tool that is very useful to select specific areas of work within a photo.
For that we will use, for example serious to select the outline of a fish or her face, eyes, etc.
The most common tool is to select click with the left mouse button and dragging do a square, rectangle, etc.
This is good for certain situations, but what we need we, the Magnetic Lasso tool has almost magical properties.
On the left side select Magnetic Lasso
It is a very easy tool to use, select the area we want to go around, for example the body of a fish.
We began the first point on the head and we are passing and putting all your profile points.
You will see how it lives up to its name as the only magnetic usually recognize the contours and adapt.
When we're almost finished the outline, clik twice and the selection is closed.
We already have a selected area where working with the approach.
This is one of the most grateful of the process and also important parts because if we had to approach the result can be a bit "weird"
Open Filter -> Focus -> Sharpen
We have to open a window in which to work with different values, where also a small screen preview the changes we perform appears.
I recommend this little screen preview normally comes with the zoom to 100% bajéis something to have a more complete view of change.
We will take the stick of pixels and we go up in value, with June 1, it may be enough ... or too much.
Do tests to see results and keep in mind that to see the changes in real time, you have to click on the image on the small screen preview window. There you will see how something changes the thing.
We can also change another option that is ratio, only a little change and look to see what we think.
Here our photo must already have a much more attractive appearance.
The next step may not be necessary but it is also interesting. If buscabamos focus before, now we want to blur.
Blur will be useful in some pictures where you look too deep, a piece of another fish or filter, we do not want to call attention or similar situations appear.
This would be similar case, select the area you want to blur the already known tool Magnetic Lasso
Again we will go step by step putting points with the left mouse button and anger following line those points.
When we opened the selected area Filter -> Blur -> Smart Blur
This is a similar tool in their use to the approach we have just met. In this case it is worth remembering that it is always better subtle drastic change you can give us an unrealistic blur.
Again we have to test and try to get a realistic result and not very exaggerated.
And with that ending and we would go our photos and will look better.
If you like to add frame it is also very simple and with many possibilities.
We will open again Image -> Canvas Size
You will see a window where you can change the policy, activate the Relative ground and put Cm.
It is try depending on the size of your photos. In the window you will see that you can change some numeric values, you go trying different measures as 2-3-4-5-6-7-8 cm until you find the extent that fits the size of your image.
The photos of my camera are quite large as 120 cm by 50 cm and stuff, usually I put 8 cm frame.
Keep trying and you will find the ideal measure.
In the same window below you can put the color you want in the frame; White, Black, Blue, Yellow or even several colors to your liking.
And for the most important end as storage.
Open File -> Save As and put where best you look or where usually put your photos.
Remember the rename to not replace the original picture and not miss any.
You have to see when stored in that format is doing, usually will do it in .psd format is Photoshop, which allows you to continue to edit the photo later.
But what we want is to keep the final copy, which we will change the .psd to .jpeg, a format we all know, both we and our computers, displays, the photobucket, etc.
After saving the photo, telling close the photo do not want to save in the window that will come out and we can start with the following.
I hope you find it useful and not much mess, if you follow these steps give surprising results.
Any question or questions you have to ask and look for solutions.
For the second part you will be seeing more graphic settings every step I appreciate that I mandarais a photo with which to work, so you will see how these simple steps they can manage many photographs.
If possible as I said above that as the fish see relatively close and focused.
As you could see we have only used a few tools of the hundreds or thousands who have Photoshop in any version.
I started relatively recently with this program and am slowly discovering interesting tools and treatments.
According desenvolviendome go best with it, I'll put new tutorials for you can also move forward and achieve results with spectacular photos.
Gr3tings !!!